With our daughter starting dance class this week at Center Stage School of the Arts, we thought it might be a good time to revisit some photos we captured for them back in early 2006….
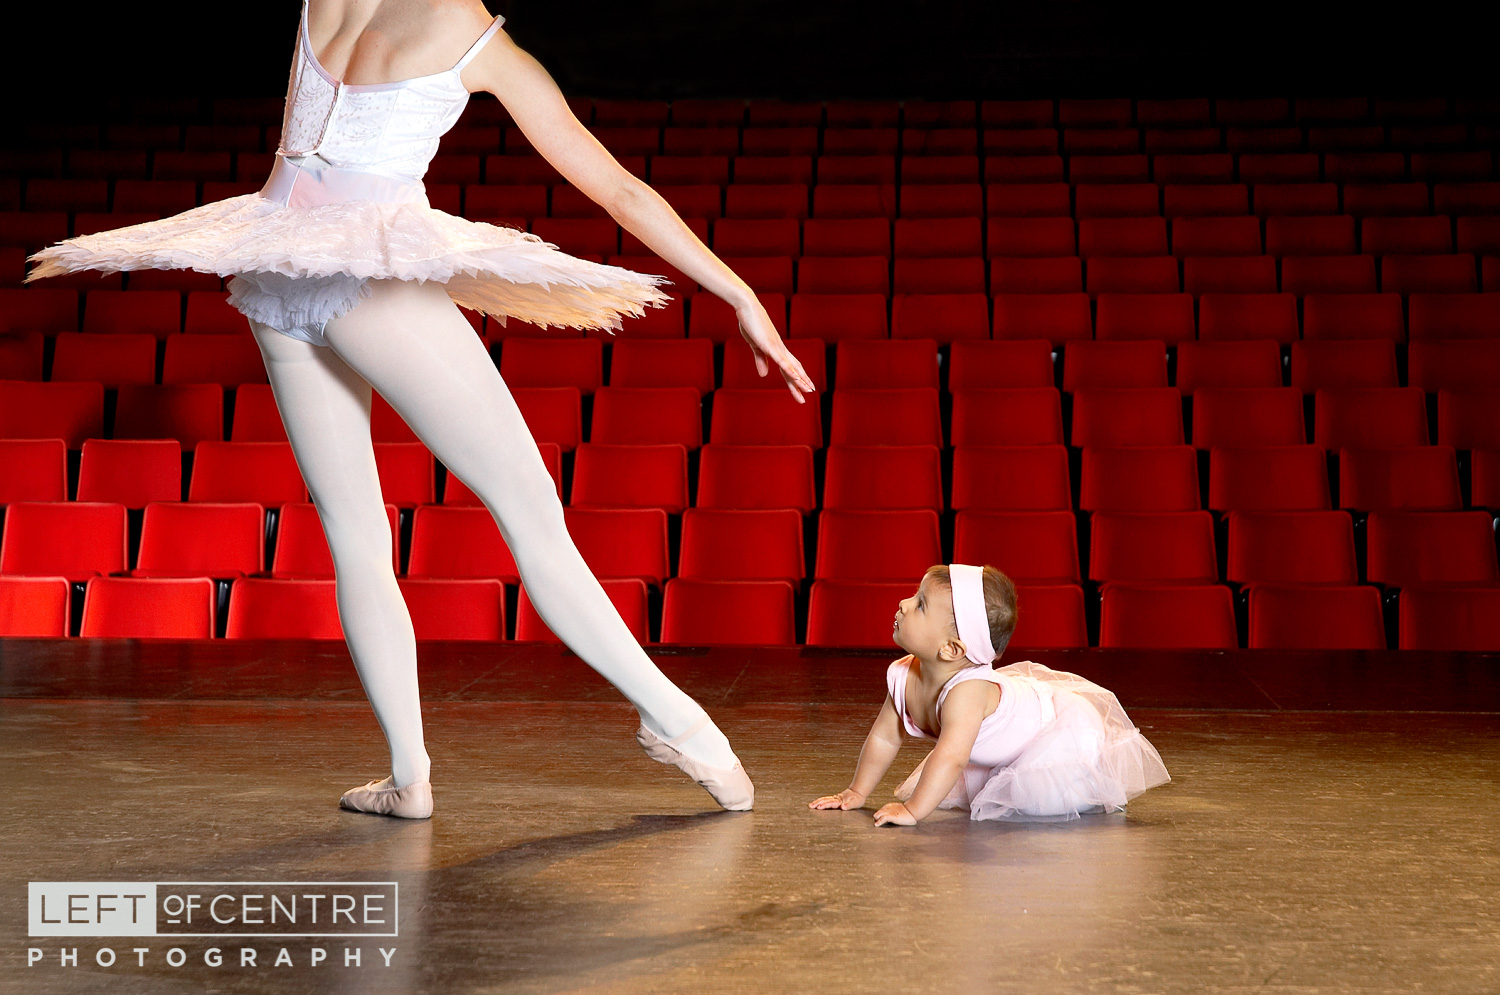
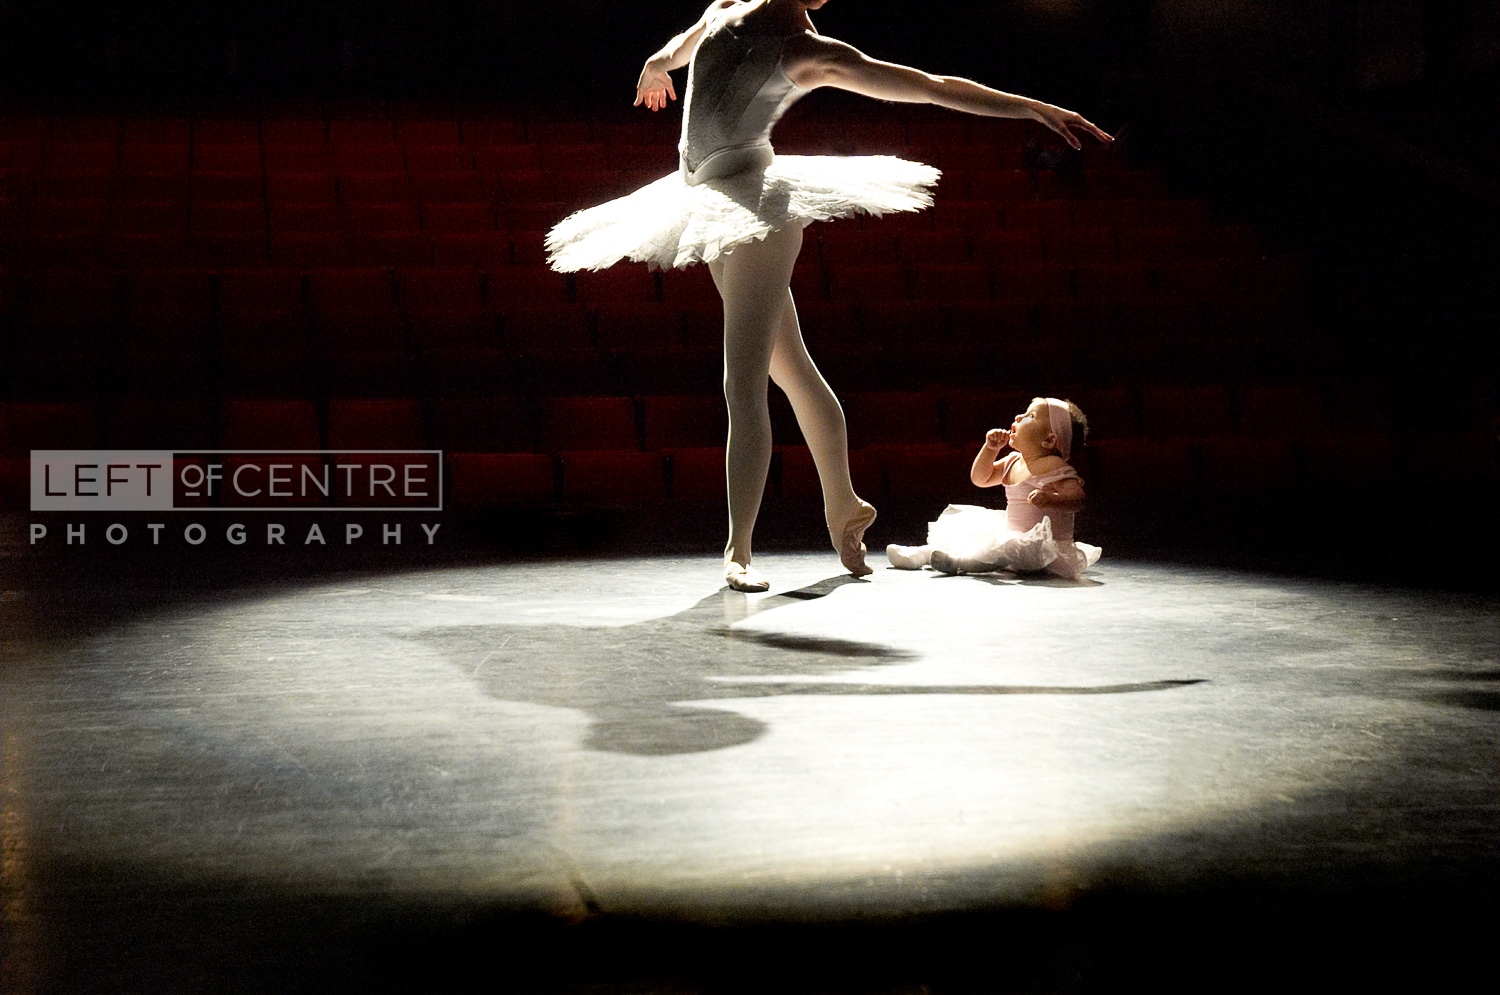
The vision was to represent the young dancer and their goal in reaching for the skills of the older, experienced dancer…an attempt to create a visual representation of the dream. So, in the cold of February we interrupted a dress rehearsal at the John Elliot Theatre and set about to capture the magic!
Utilizing one of the owner’s very young daughter, we pitched our lights around the theatre and set up our tripod on stage. Our young dancer was very operative, and very mesmerized by the ballerina in front of her! We got a bunch of great shots relatively quickly - which was good, because we were surrounded by dancers who wanted to keep rehearsing! - but we took a bit more time away from their practice to get a different look.
Studio lighting is the professional photographers tool for ensuring that you are able to get a proper exposure of all elements of the final image - to create a 2D image you need to be aware of all the light in the three dimensional world. On four of the examples below, there’s a light specifically for the red seats, and another light on the stage (to the side) to light up the dancers. The positioning of the lights is critical to highlight features of the environment, create the shape of the shadows and the overall feel of the photograph. The image changes when the direction of the light changes - for example, a “direct” light source like a flash mounted on the camera will light up the subject in front of the lens but darken down the background!
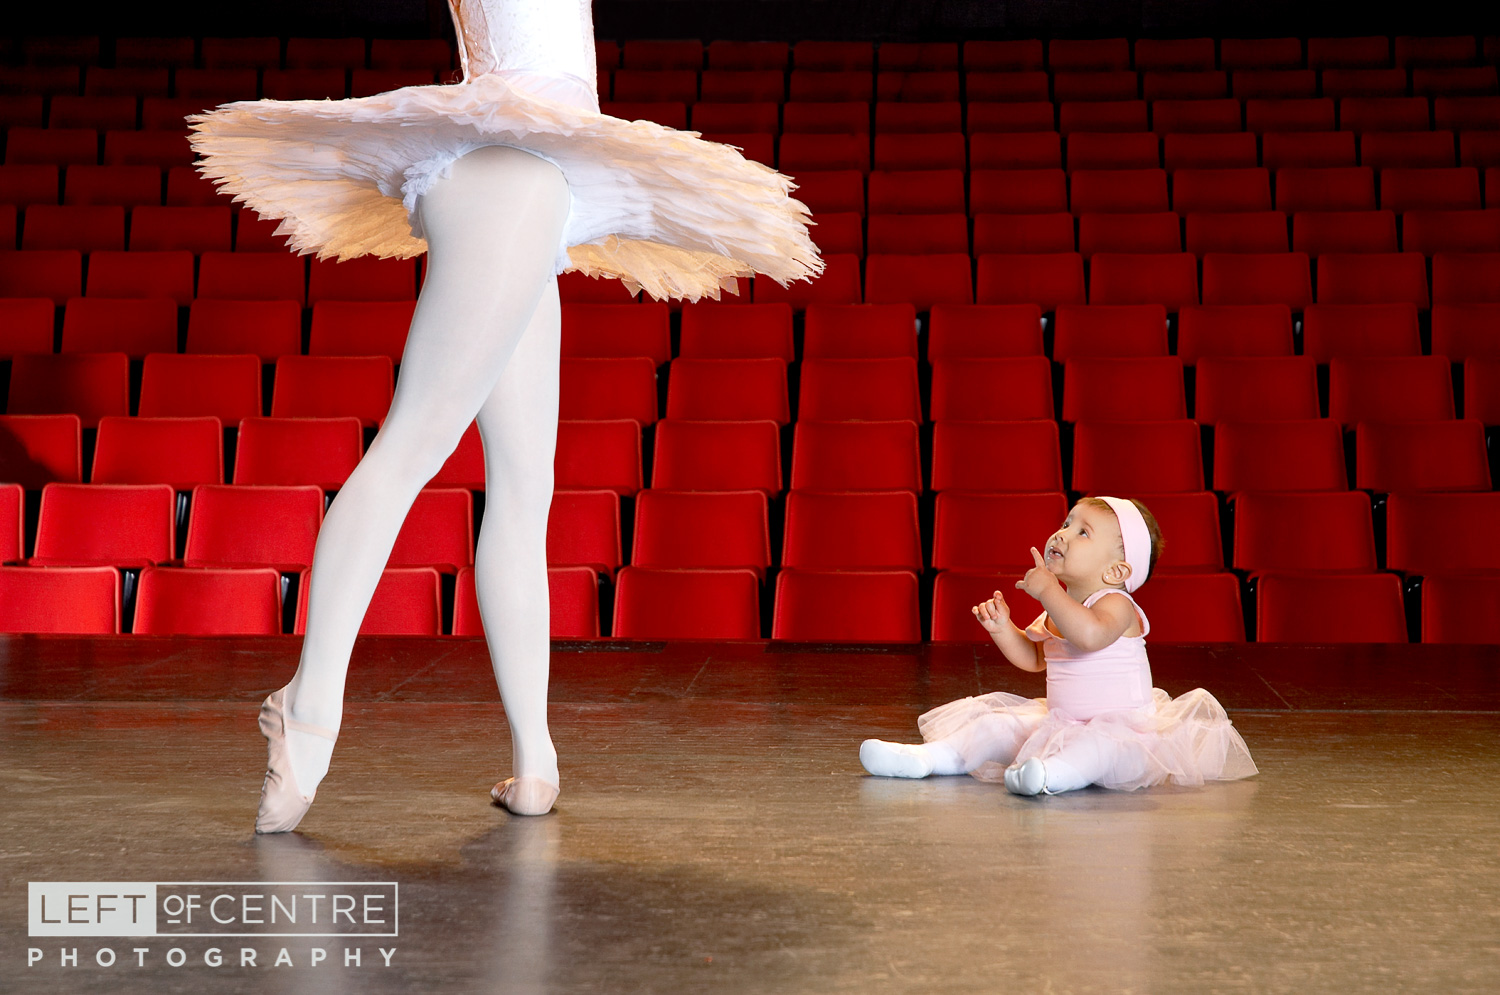
After getting some great shots, we just weren’t satisfied the we got “the” shot…so we made some adjustments. We turned off our lights and adjusted the camera exposure settings to the spot light provided. It accentuated the shadows on the stage and provided a lovely glowing effect around the subjects that the powerful studio lights had minimized. By that point, our tiny model was providing some awesome expressions that captured the joy and wonderment of a youngster entranced by dance!
We did use one little trick though…to help keep the little one focused on reaching for the ballerina’s leg, we placed a tiny piece of duct tape on the tights! Kids just can’t resist grabbing that sticky tape!!!
Although they are almost 14 years old, these images still stand up to the test of time…and they are still proudly displayed in the ballet studio at Center Stage for the next set of tiny dancers to be inspired to reach for their dreams!


Check out some other Dance stuff we’ve done in the past by clicking here. Let us know what you think! We’d love to hear from you!
Amy & Jeff